Campusprint
With the Campusprint we provide university-wide devices on which every student and employee of the university can print, scan and copy. All that is required is a valid student card, service card or transpondership (intrakey). You can only reach campusprint.hs-wismar.de within the campus network.
The devices are operated by the ITZ-Informationstechnologie-Zentrum Rostock GmbH.
What is new about Campusprint?
- Top up credit via PayPal or voucher codes from the AStA
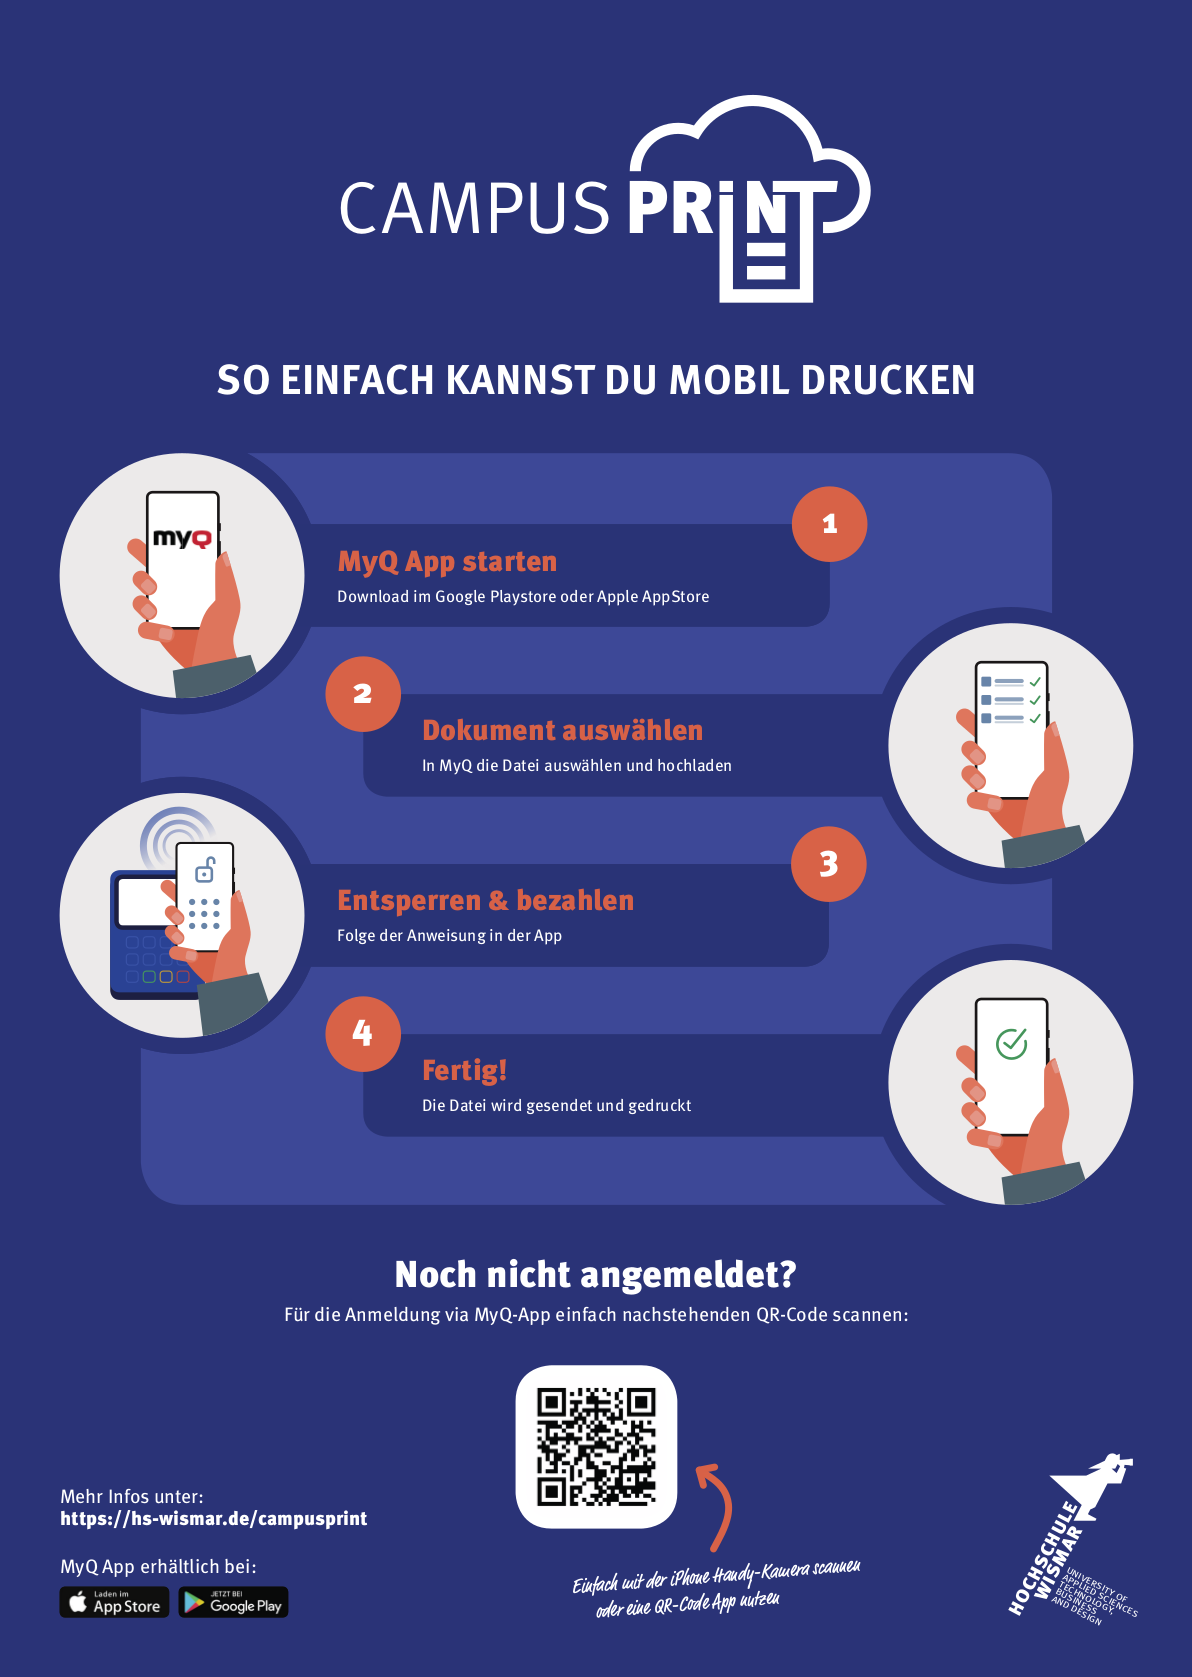
- Printing via "MyQ Mobile Printing" App, file upload via browser campusprint.hs-wismar.de or classic with printer driver for Windows, Mac or Linux
- Scan2E-Mail - simply send documents to the university e-mail address
On the following pages you will find instructions, answers to frequently asked questions and an overview of the Locations of the available printers.
Operation and functions of the multifunction devices
Logon / Copy - 01:17 // Print - 01:35 // Scan 02:05 // Logoff 02:34
NOTE, applies only to employees and students of the Warnemünde location!
The Warnemünde site operates its own campus print server, which can be reached at https://campusprint-sf.hs-wismar.de. This URL can also be used to load credit via PayPal or voucher! Vouchers can be purchased from the Department of Maritime Administration. If campusprint.hs-wismar.de is used in the instructions, this must be replaced by campusprint-sf.hs-wismar.de.
Credit reload via PayPal or voucher
- Login with ITSMZ access data to https://campusprint.hs-wismar.de
- Under Credit select "Top up credit".
- Select payment service provider voucher or PayPal
- Coupon/Voucher
- Enter the voucher code and confirm with "top up".
- Can be purchased at the AStA
- PayPal
- Enter amount (at least 5,00 €)
- Confirm with "top up credit" and follow the PayPal instructions.
- Coupon/Voucher
ATTENTION, pop-up window PayPal allow
- Login with ITSMZ access data to https://campusprint.hs-wismar.de
- Select "Print file" under Jobs
- Select the file to be printed with "Browse"
- Select options if necessary (B/W, Duplex, Number)
- Send file to print server with "OK
- Print job can now be printed on the copier of your choice
Scan2Mail
- The scanned documents are automatically sent to the email address of your user account.
- Do not send more than 20 pages one-sided or 10 pages two-sided per scan, otherwise the PDF file will exceed the maximum e-mail attachment size and cannot be delivered.
Scan2Web
- For Scan2Web there is no limit to the number of pages.
- The generated PDF document is stored encrypted on the Campusprintserver and can be retrieved under https://campusprint.hs-wismar.de

QR-Code for the login at the MyQ App


Driver Installation Windows
- right mouse button on Windows logo Start menu
- Select Control Panel
- Devices and printers
- Add Printer
- Select "The printer is not in the list".
- Select "Shared printer by name" and click on "Browse".
- For printer, enter \\campusprint.hs-wismar.de:
- Enter ITSMZ access data
- Enter the user name as follows: hsw\st...
- Select Save login data
- Select MyQ_sw for b/w prints
- Select MyQ_color for color prints
- Confirm twice with "Next" and once with "Finish"
- Download printer driver from hier >>
- Installing the Printer Driver
- OSXdriver\ OS X 10.9 or higher\ Execute OS X 10.9+build 2018.10.10.pkg
- Press "Continue" three times, "Accept" once and confirm with "Install".
- To "install the software" enter the user data of your MAC once.
- Connecting the Print Server
- In the system settings open Printer & Scanner
- Click on "+" for "Add
- Select Advanced
- If Advanced is not displayed:
- "Press "Control key" + "left mouse button" and select "Customize toolbar
- "Add "Advanced
- Type: Select "Windows printer via spoolss
- URL: smb://campusprint.hs-wismar.de/myq
- Name: campusprint.hs-wismar.de
- Use: Select software
- Filter: 4053
- Select Kyocera TASKalfa 4053ci (KPDL)
- "Add"
- Add the following options:
- Paper feeders: Cassettes 3,4
- Activate punching unit
- Finisher: 1000-sheet finisher
- Select Advanced
- Important to finish by printing a page!
- The ITSMZ access data is now requested once only.
- Enter the user name as follows: hsw\st...
- \ give them a "control "+"shift "+"7" or also "alt "+"shift "+"7" as follows
- Enter your password
- Activate "Save password in keychain"
For printer driver installation under Linux, the following packages must be installed:
- cups
- samba
- smbclient
- cifs-utils
# sudo apt install cups samba smbclient cifs-utils
Edit the file "smb.conf" with # sudo vi /etc/samba/smb.conf and add the following entries under [global]:
workgroup = hs-wismar.de
client min protocol = SMB3
client max protocol = SMB3
Driver installation:
- the driver for (PPD-file) can be found here as zip-file
- Starting the printer settings from the CLI
# sudo system-config-printer
Printer queue MyQ
- add
- select under network printer „Windows-printer via SAMBA“
- enter smb://campusprint.hs-wismar.de/myq
- Set authentication details now (ITSMZ-Access data)
- Password:
- username:
- Vorwärts (forward)
- select PPD-file
- select for MyQ - file „Kyocera TASKALFA 3212i.PPD“
- Vorwärts (forward)
- Installable options:
- Paper feeders: cassettes 3,4
- Finisher: 1000-sheet-Finisher
- select punching unit
- Vorwärts (forward)
- Describe printer
- printername: MyQ
- Description: Campusprint
- apply
- Print test page
- OK
- select under network printer „Windows-printer via SAMBA“
- Call up printer properties from MyQ
- Printer options
- Paper source: Select cassette 3 and confirm with OK
- Registration takes place at https://campusprint.hs-wismar.de
- "Click on "New account
- Enter your name
- Enter private e-mail address (required for Scan2E-Mail and used as user name)
- "Click on "Register
- Log in with e-mail address and PIN
- Don't forget to top up your credit
No registration with student card, employee card or IntraKey possible?
Simply log on to the printer with ITSMZ access data and register the appropriate chip/ID card under "ID card registration".
The selection "top up credit" via PayPal is not displayed?
The function "top up credit" is currently only available in the desktop view of campusprint.hs-wismar.de . For the "Mobile View" and for the MyQApp we are already working on it.
Where can I find a transaction receipt when I have toped up my credit balance via PayPal?
Simply log in to the PayPal website and print the corresponding receipt under Activities.
Why do I get the error message "Page not found" when I visit campusprint.hs-wismar.de?
Campusprint is a service accessible only from the networks of the University of Wismar. The networks are: WLAN (eduroam), LAN (Labore, PC-Pools …) or via VPN.

