Digital signature for PDF documents
To digitally sign PDF documents ...
- ... A valid personal certificate must be available.
- The certificate must be applied for and downloaded. You can find instructions on how to do this here.
- The certificate must be imported into the certificate store of the operating system.
Import certificate


- Navigate to the location of your certificate file and double-click on the certificate to start the certificate import wizard (Fig. 1).
- Select "Current user".
- Confirm by clicking on "Next" (Fig. 2).
- Confirm the next window with "Next".
Finalise import


- Enter the password for your certificate (certificate password that you also use when sending an encrypted mail).
- Deactivate all ticks except the last one.
- Confirm by clicking on "Next". (Fig. 3)
- In the following dialogue, activate "Automatically select certificate store".
- Confirm with "Next". (Fig. 4)
- Complete the import by clicking on "Finish". (Fig. 5)
- You will receive the message "The import process was successful". (Fig. 6)


In the "Keychain Management" app (Fig. 1) on the Mac, select either the "Login" or "System" keychain (Fig. 2).
Drag and drop the certificate file onto the "Keychain Management" app (Fig. 3).
Enter the name and password of an admin on this computer when prompted (Fig. 4).


Note: Use a current version of Acrobat Reader. If necessary, install Adobe Acrobat via the Matrix42 Software Depot.
- Open the document to be signed in a PDF editor (e.g., Adobe Reader). Simply opening a PDF document in a browser-based viewer is not sufficient.
- Click on a signature field.
- If multiple certificates are available, select the correct one (GEANT... with the latest expiration date).
Then click Next. - In the “Sign as...” window, click the Create button.

5. In the Customize Signature Appearance window, click image above the signature preview, and then click Browse below the signature preview to insert a copy of your signature.

6. Next, locate the scanned or photographed signature on your computer in .pdf format and select it (Open).

7. The new signature will then be displayed. Confirm the change by clicking Save.


8. Finally, the new signature must be verified once more before it can be used to sign documents. To do this, click the Verify button, review the appearance integrity report, and then close it.

9. The document is now ready to be signed.
- Once all required signatures are on the document, the document can be locked after the signature is entered, if that option is enabled.
- The signed document must then be saved.
Note: Create a copy of your signature
Digitize your signature in PDF format:
- Write your signature in a drawing program using a mouse, a digital pen, or your finger on a touchscreen.
- Trim the margins.
- Print the drawing as a PDF.
- Take a photo of a handwritten signature on white paper with your smartphone.
- Crop the margins.
- Email the cropped photo to yourself.
- Open it on your local computer and print it as a PDF.
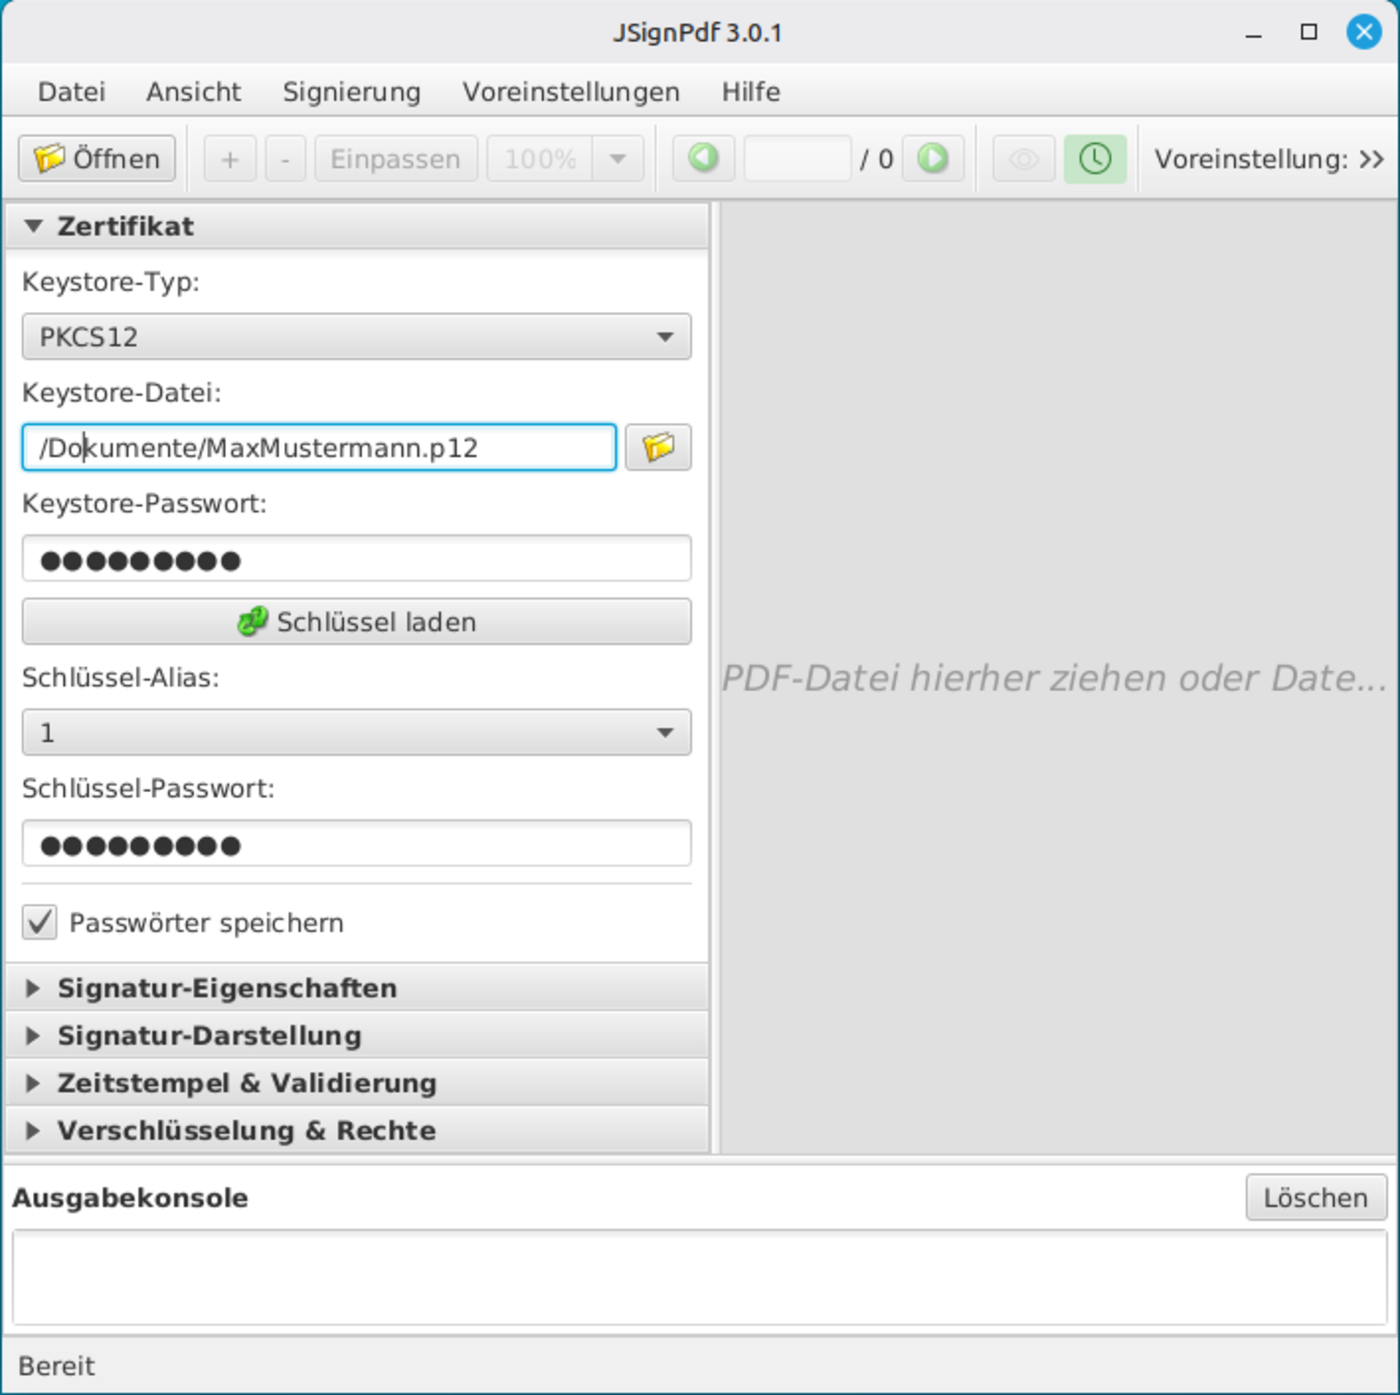
Note: Be sure to use the latest version of JSignPDF. If necessary, install JSignPDF via Flatpak for your distribution.
1. In the left-hand menu, under “Certificate,” import your current user certificate as a PKCS12 file and enter your password as both the keystore password and the key password.
2. Configure the signature properties. For example: Location: HS-Wismar
3. Load a document.
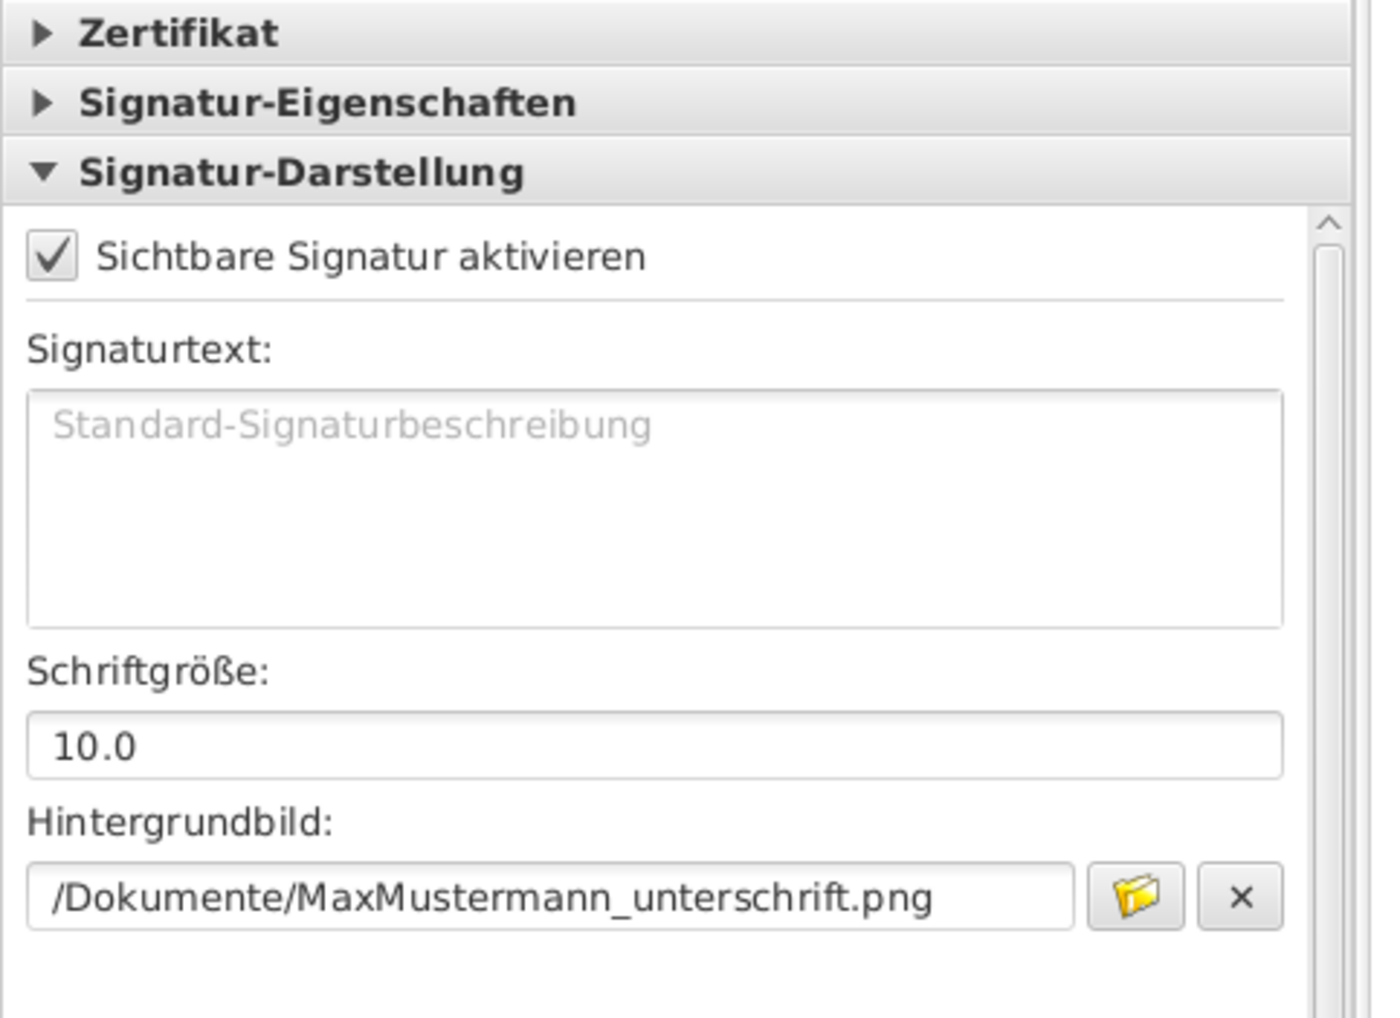
4. Under “Signature Display,” enable “Visible Signature” and set a digital image of your signature as the background image.
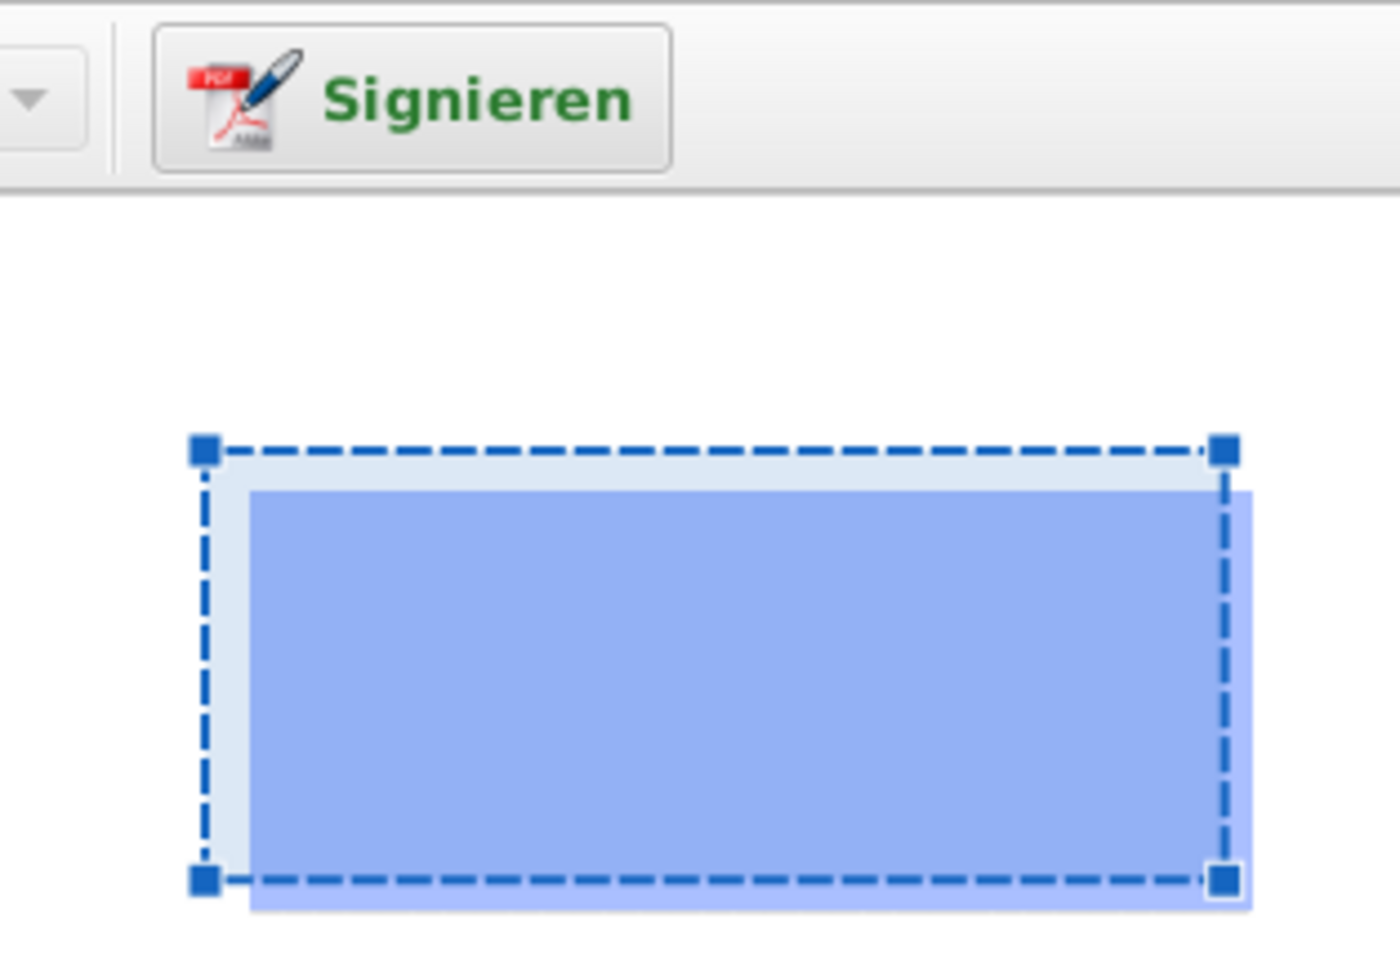
5. Place a signature field on the document and save the document by clicking the “Sign” button.