CampusCloud
The Wismar University of Applied Sciences provides all students and staff with storage space that can be automatically synchronized to any device (PC, Android, iOS). The functionality is similar to a dropbox. However, the data is stored on the university's servers and transmitted in encrypted form.
5 GB storage space for students
10 GB storage space for employees (can be increased on request.)
Clients are available for the following operating systems: Windows 7-10, OS X, Linux, Android, iOS
Login
Please login with Your user ID and password.
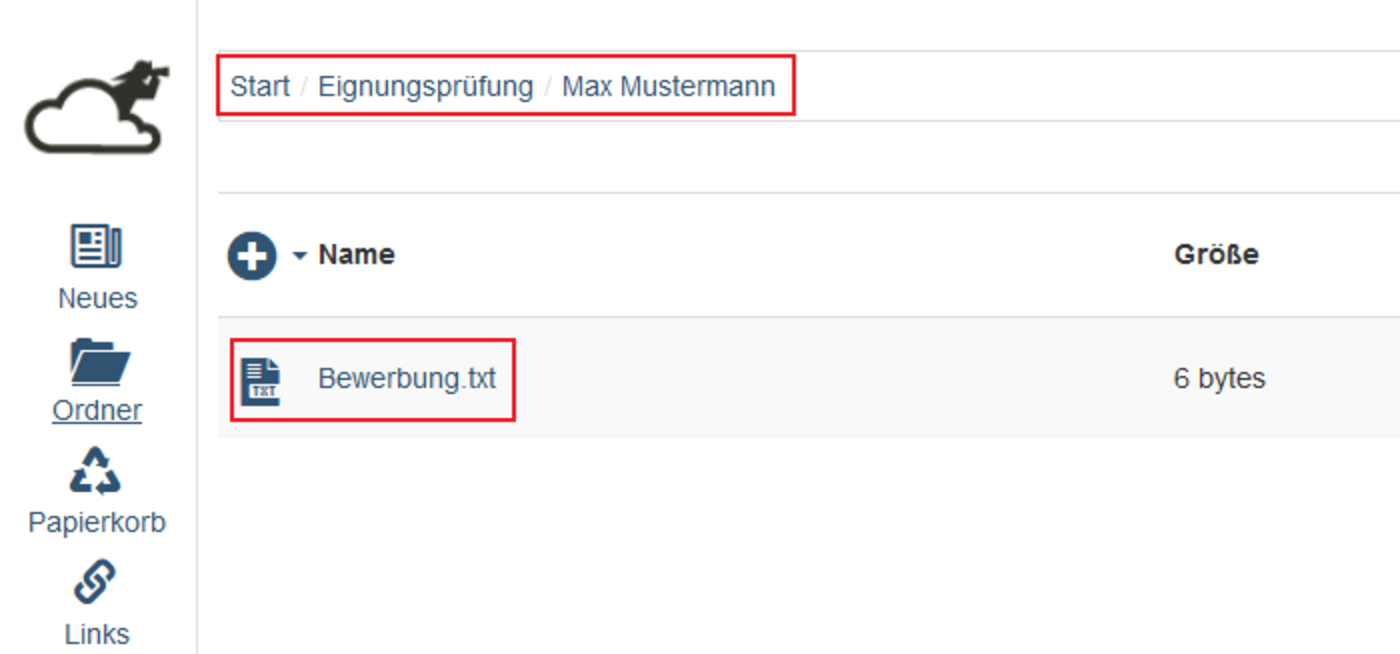
File Management and Access Rights

When you open the page, you will automatically be taken to the first submenu Folder (1), which displays all the folders you have created so far. Use (2) to invite other users to download or upload files from this folder. Button (3) allows you to download the entire contents of the folder as a compressed zip file. You can also create a link to a zip file of the folder (4) and send it. With (5) you can rename the folder and with (6) you can remove it.
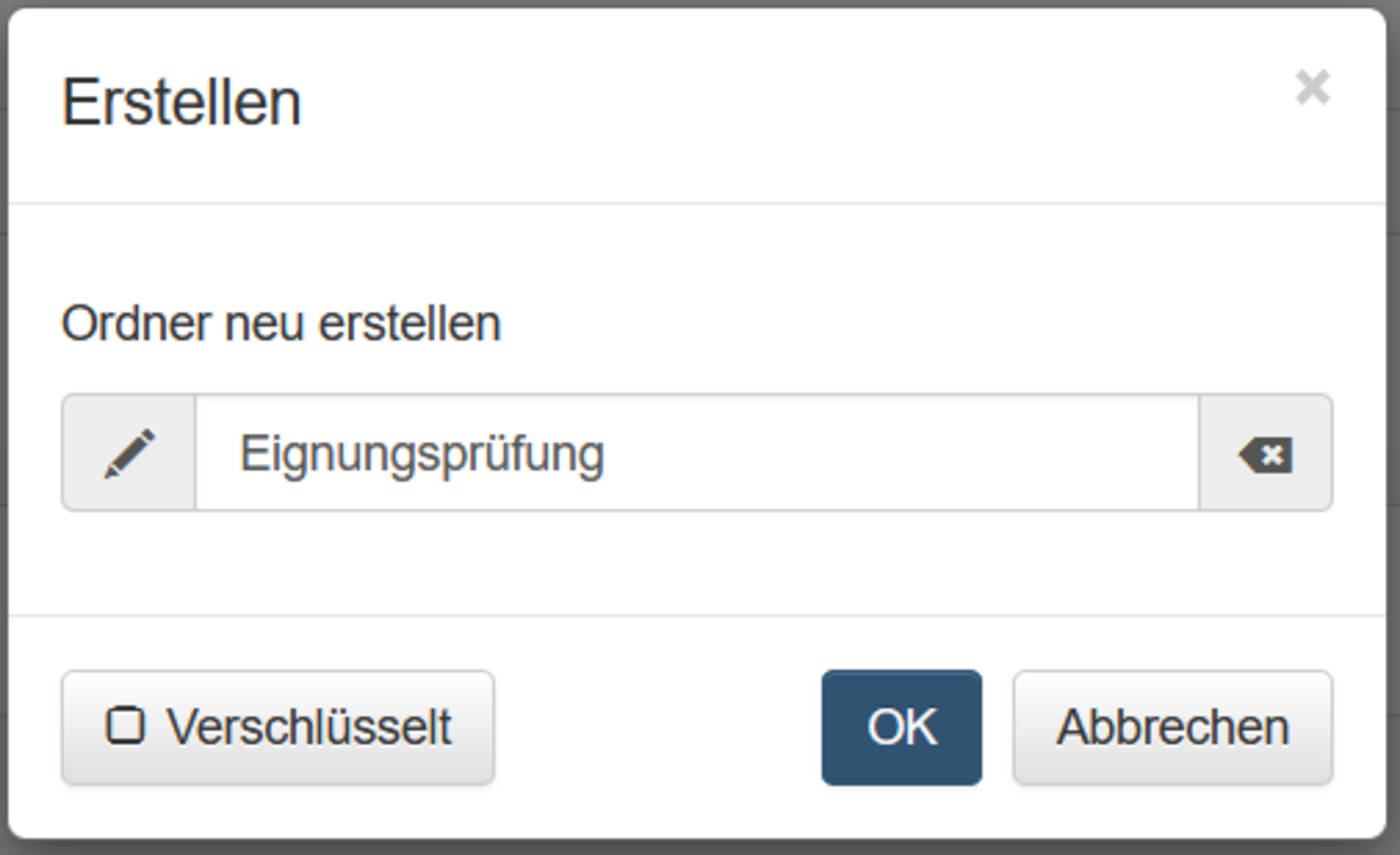
With a click on the folder symbol (7) you can create a new folder.

At the top left (1) you can add further files or subfolders. At the top right, you have various options at your disposal: With a click on (2) you can restore accidentally deleted files. (3) and (4) changes the view. If you have uploaded media files, you can play them by clicking (5). (6) gives you a summary of the invited members and their permissions - they can also be adjusted there. Click on the gearwheel symbol (7) to access the settings for this folder.
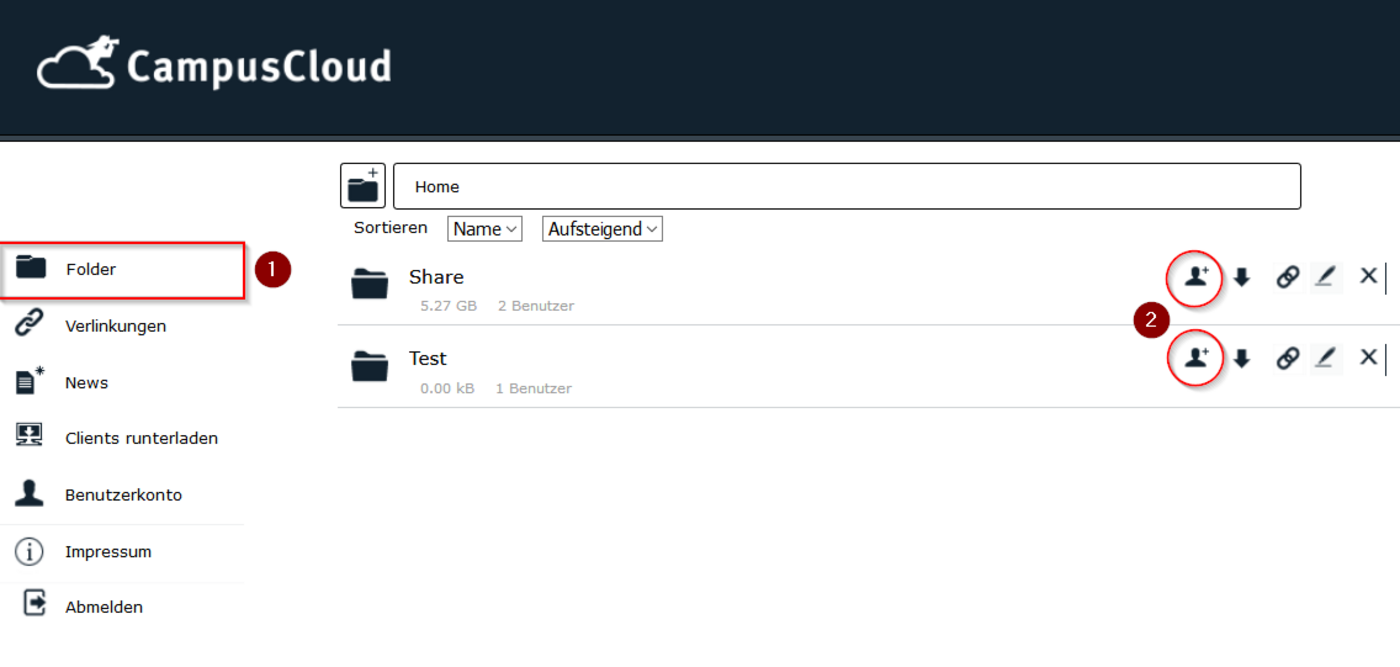
- Click on Folders (1)
- Click on the Invite button (next to the folder icon) (2)
- Enter the name or user name of a university member / e-mail address of a third party.
- If authorized, either Read (recipient can only view and download files) or Read/Write (recipient can also modify, add and delete files).
- Check the Send invitation box if you want the recipient to be informed.
- End the process by clicking Add.
Note: University members can only be found by name or user name if they have already registered with the CampusCloud in the past. If you can't find the person, just enter their university email address. The recipient will receive an e-mail request to register. However, this is not necessary for university members. A simple registration with the university access data is sufficient.
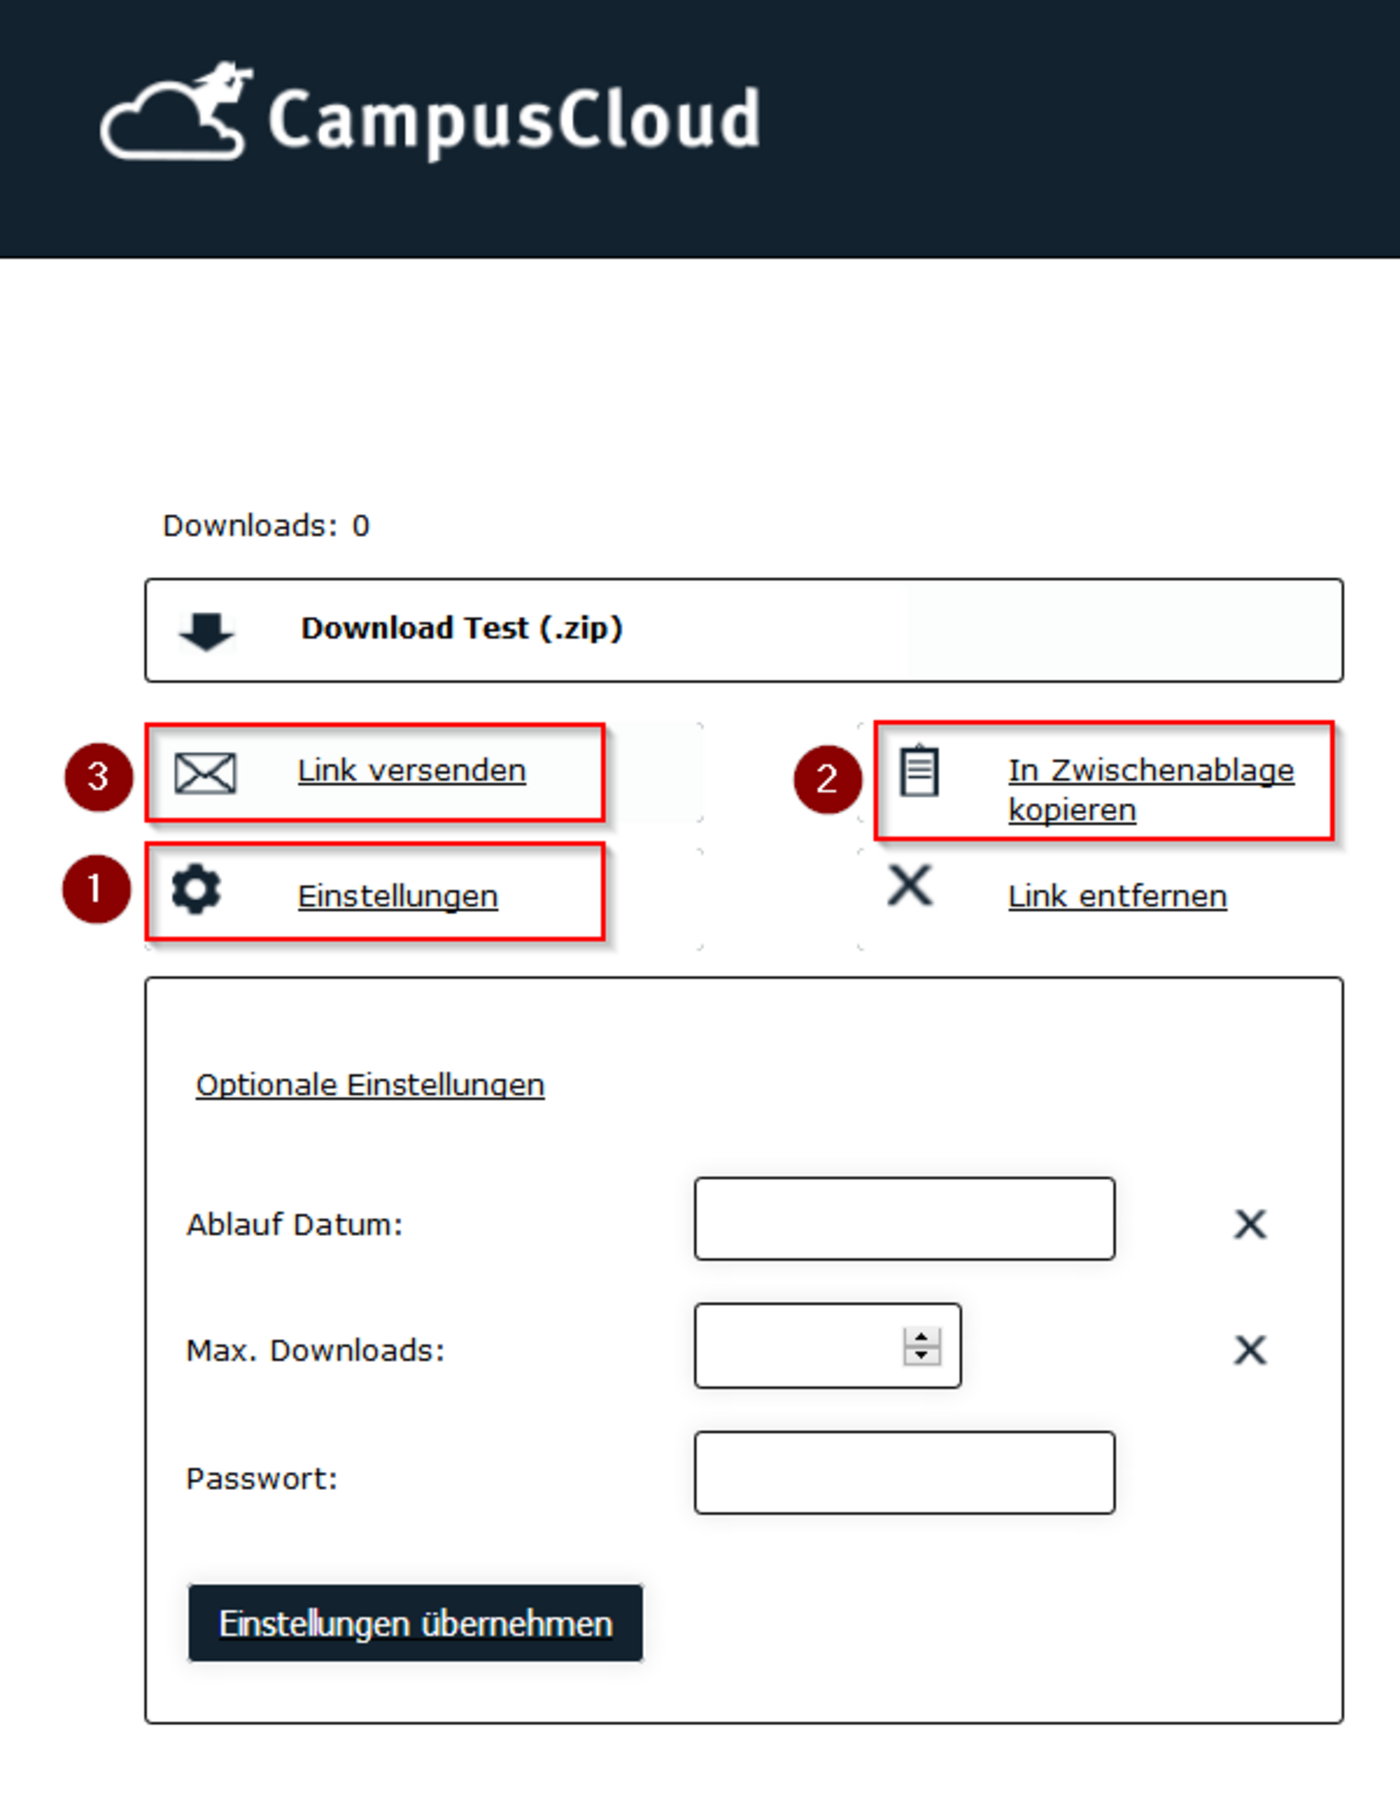
If you create a link to a folder or file, you can simply send a download link by email without the recipient having to access the CampusCloud.
- Click on Folders (or Navigation to Subfolder / File)
- Click on the button to create a link. (You will now be redirected to the created link.)
- Click on Settings (1) to set the restrictions (e.g. set an expiration date or a password).
- Click Copy to Clipboard (2) to publish the link yourself or send it by e-mail OR Send to Link (3) to send the link directly via the interface by entering an e-mail address.
The CampusCloud stores files or folders that have been deleted via the web interface or the app. To recover accidentally deleted files, proceed as follows:
- Click on Folders.
- Navigate to the subfolder where the original file was located.
- Click the Deleted Files icon in the upper right corner.
- You will now see a list of existing and deleted files in the folder. Deleted files are grayed out. To restore a file, click the green arrow icon next to the file.
Encryption offers increased security: not only the folder itself, but also all subfolders and files contained in it are protected against access by third parties, but can be shared with others as normal.
Note: An encryption of the folders/files can only be activated during the initial creation of the folder (check the box!). The files contained in the encrypted folder cannot be recovered by ITSMZ in case of loss. We therefore recommend that you only use encryption in exceptional cases.
Setting up an "Upload ONLY" folder (mailbox function)
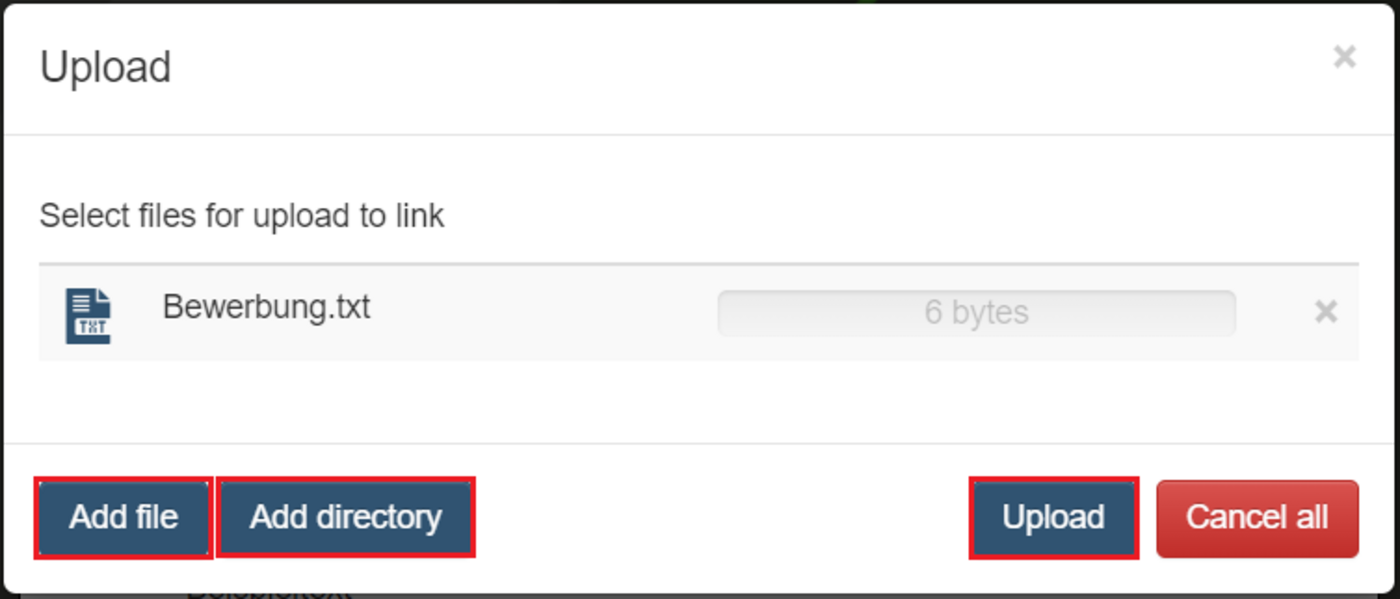
The CampusCloud enables the creation of an "Upload ONLY" folder, which allows users to upload documents without being able to view or access other users' uploads - similar to the principle of a mailbox. Even the uploading user cannot access the upload afterwards. This is the sole responsibility of the inviting site, which has created the folder in advance and provided access via a link.
The configuration of such a folder is further distinguished by the following points:
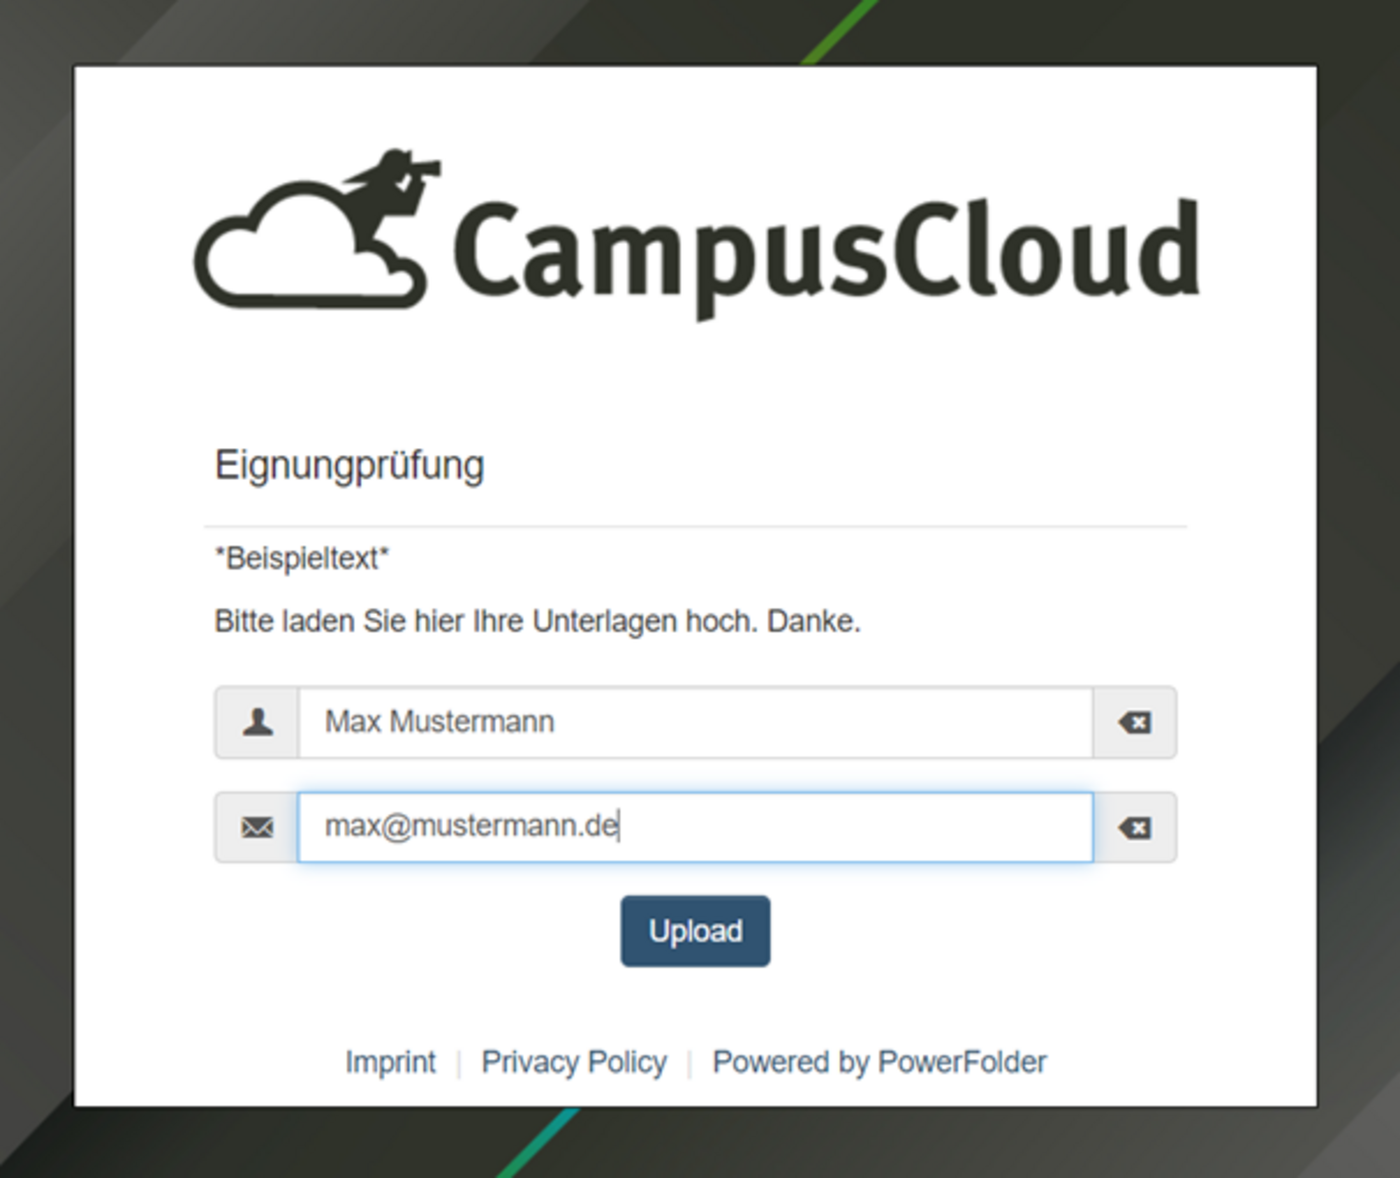
- Creation of an individual upload form to describe the content of the use case.
- Automatic creation and naming of subfolders for each incoming upload - allows for person assignment
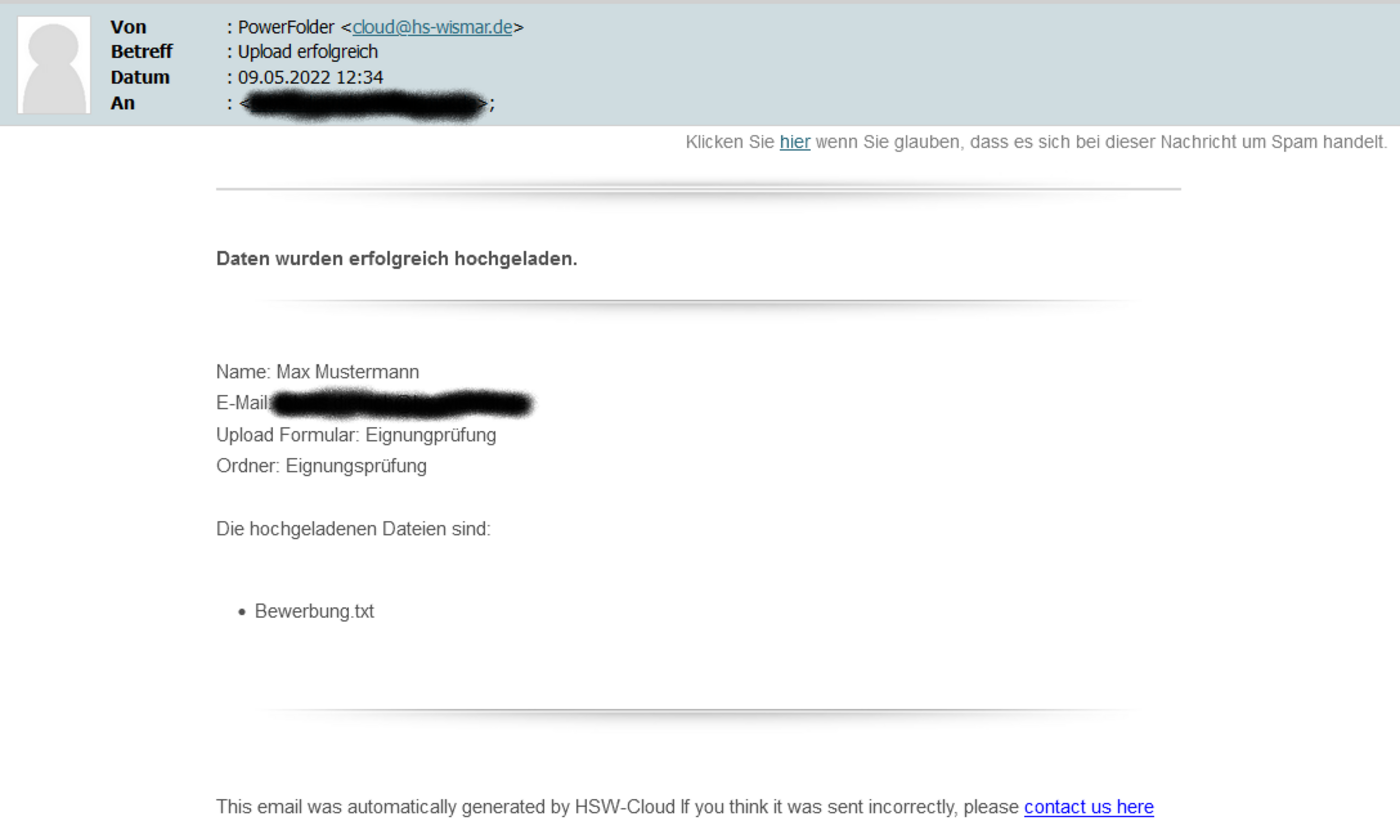
- Automatic upload confirmation for the user via e-mail
- E-mail notification for the inviter
- Configuration of an expiration date and password for the upload link
Internal access to the folder is done as usual by inviting additional users accordingly.

1. Create a new folder ("Neuer Ordner")

2. Go to "Share"("Teilen")
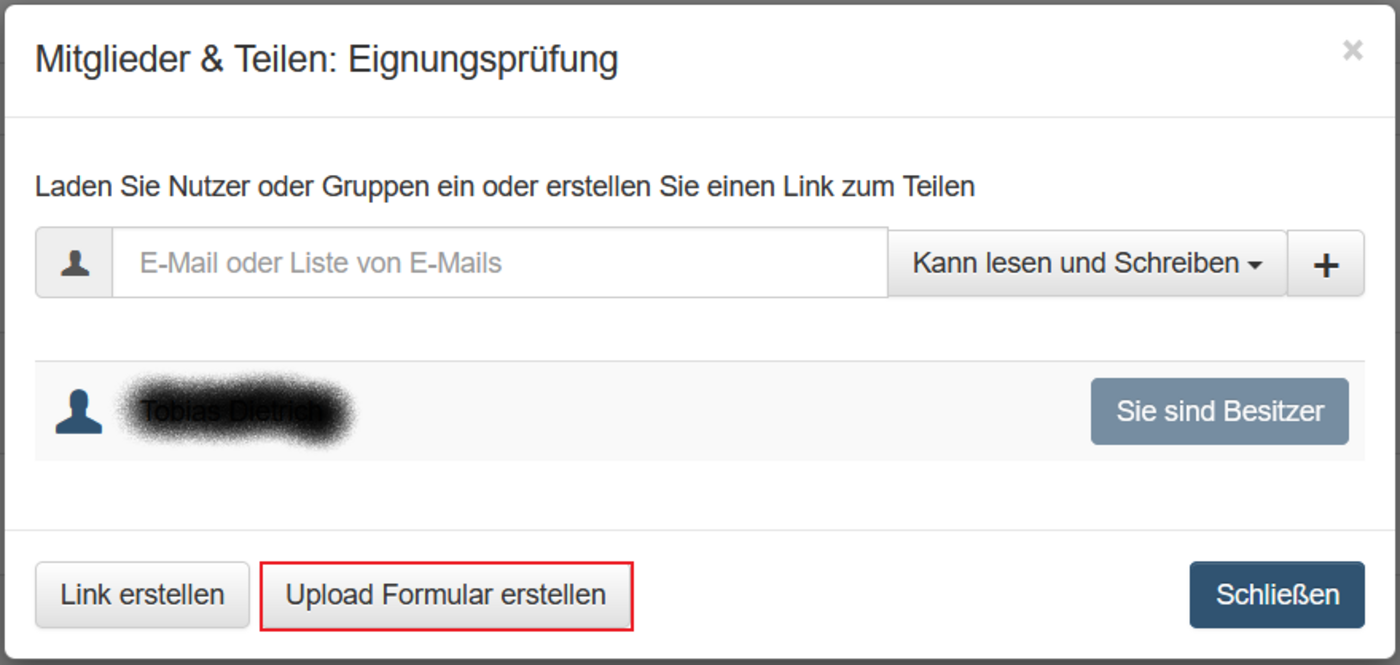

3. Create the upload form
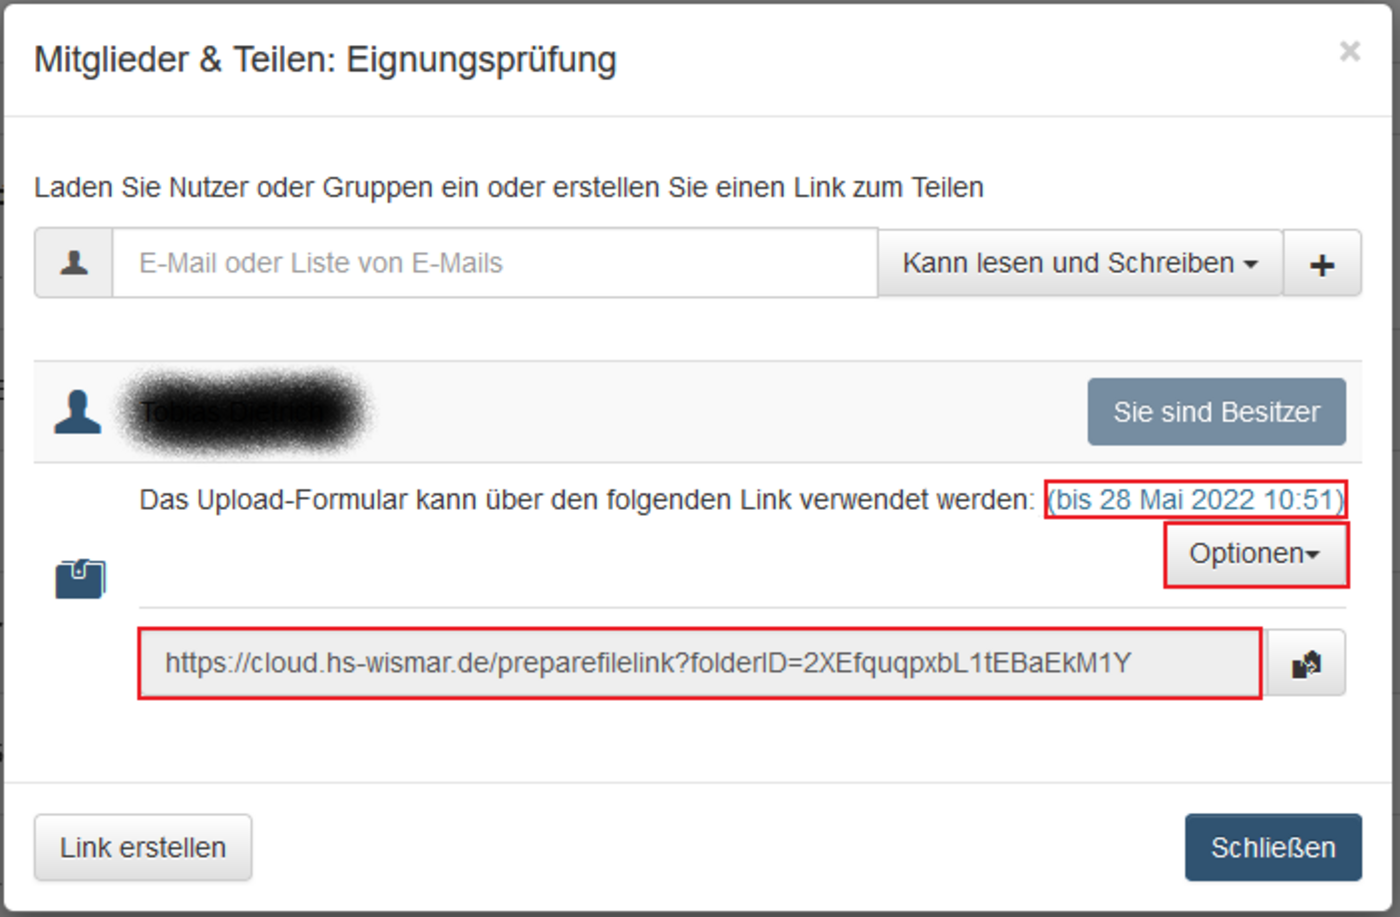
4. If necessary, adjust the form via options. You can then release the link.
The user dialogue
The confirmation e-mail
Internal processing
The previously uploaded documents are now available for internal processing in the respective subfolders.
Using the client app
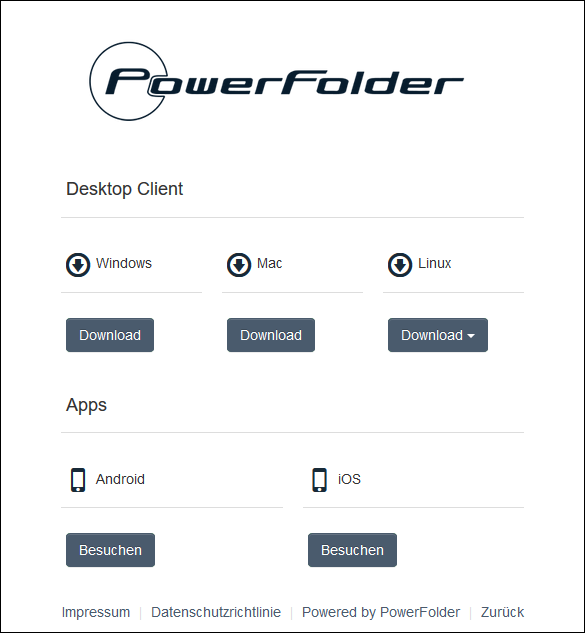
Thanks to the client, you can access the uploaded files directly from your PC or mobile device without having to use the web interface. We provide client software for almost every operating system.
Setting up and using the desktop client
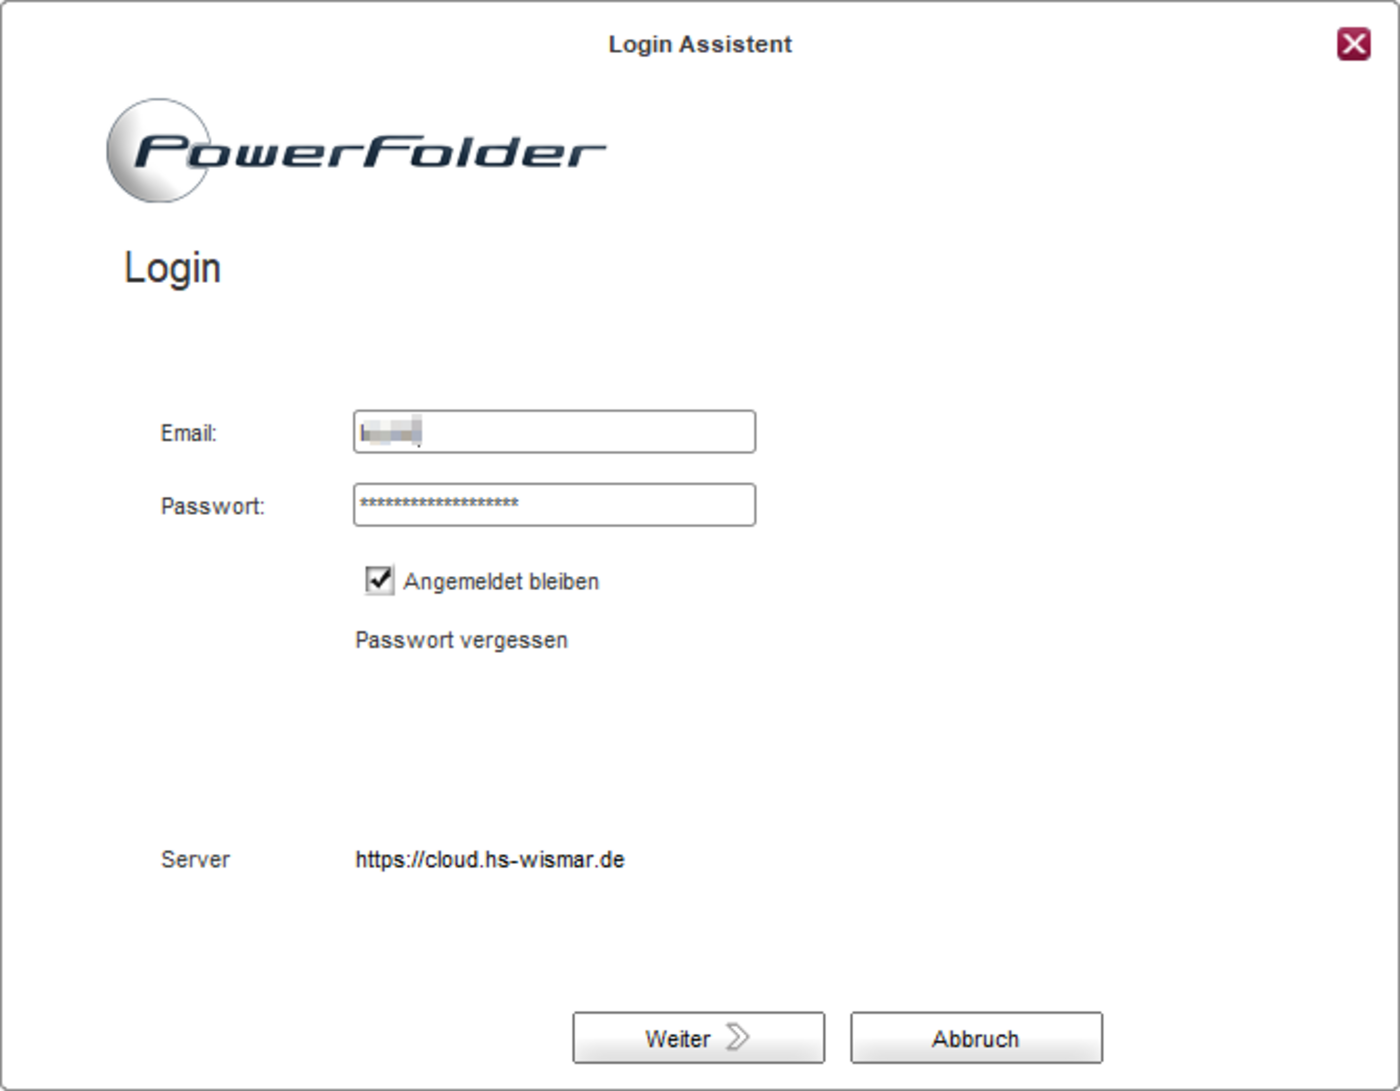
After installing the client programs for MacOS or Windows, you will find a folder named Powerfolder on your desktop containing all your folders and files. Here you can simply download or upload files by drag'n'drop the way you are used to from your file system.
You can make various configurations in the client software itself. Information about their use can be found in the official PowerFolder documentation.
Setting up the Mobile App
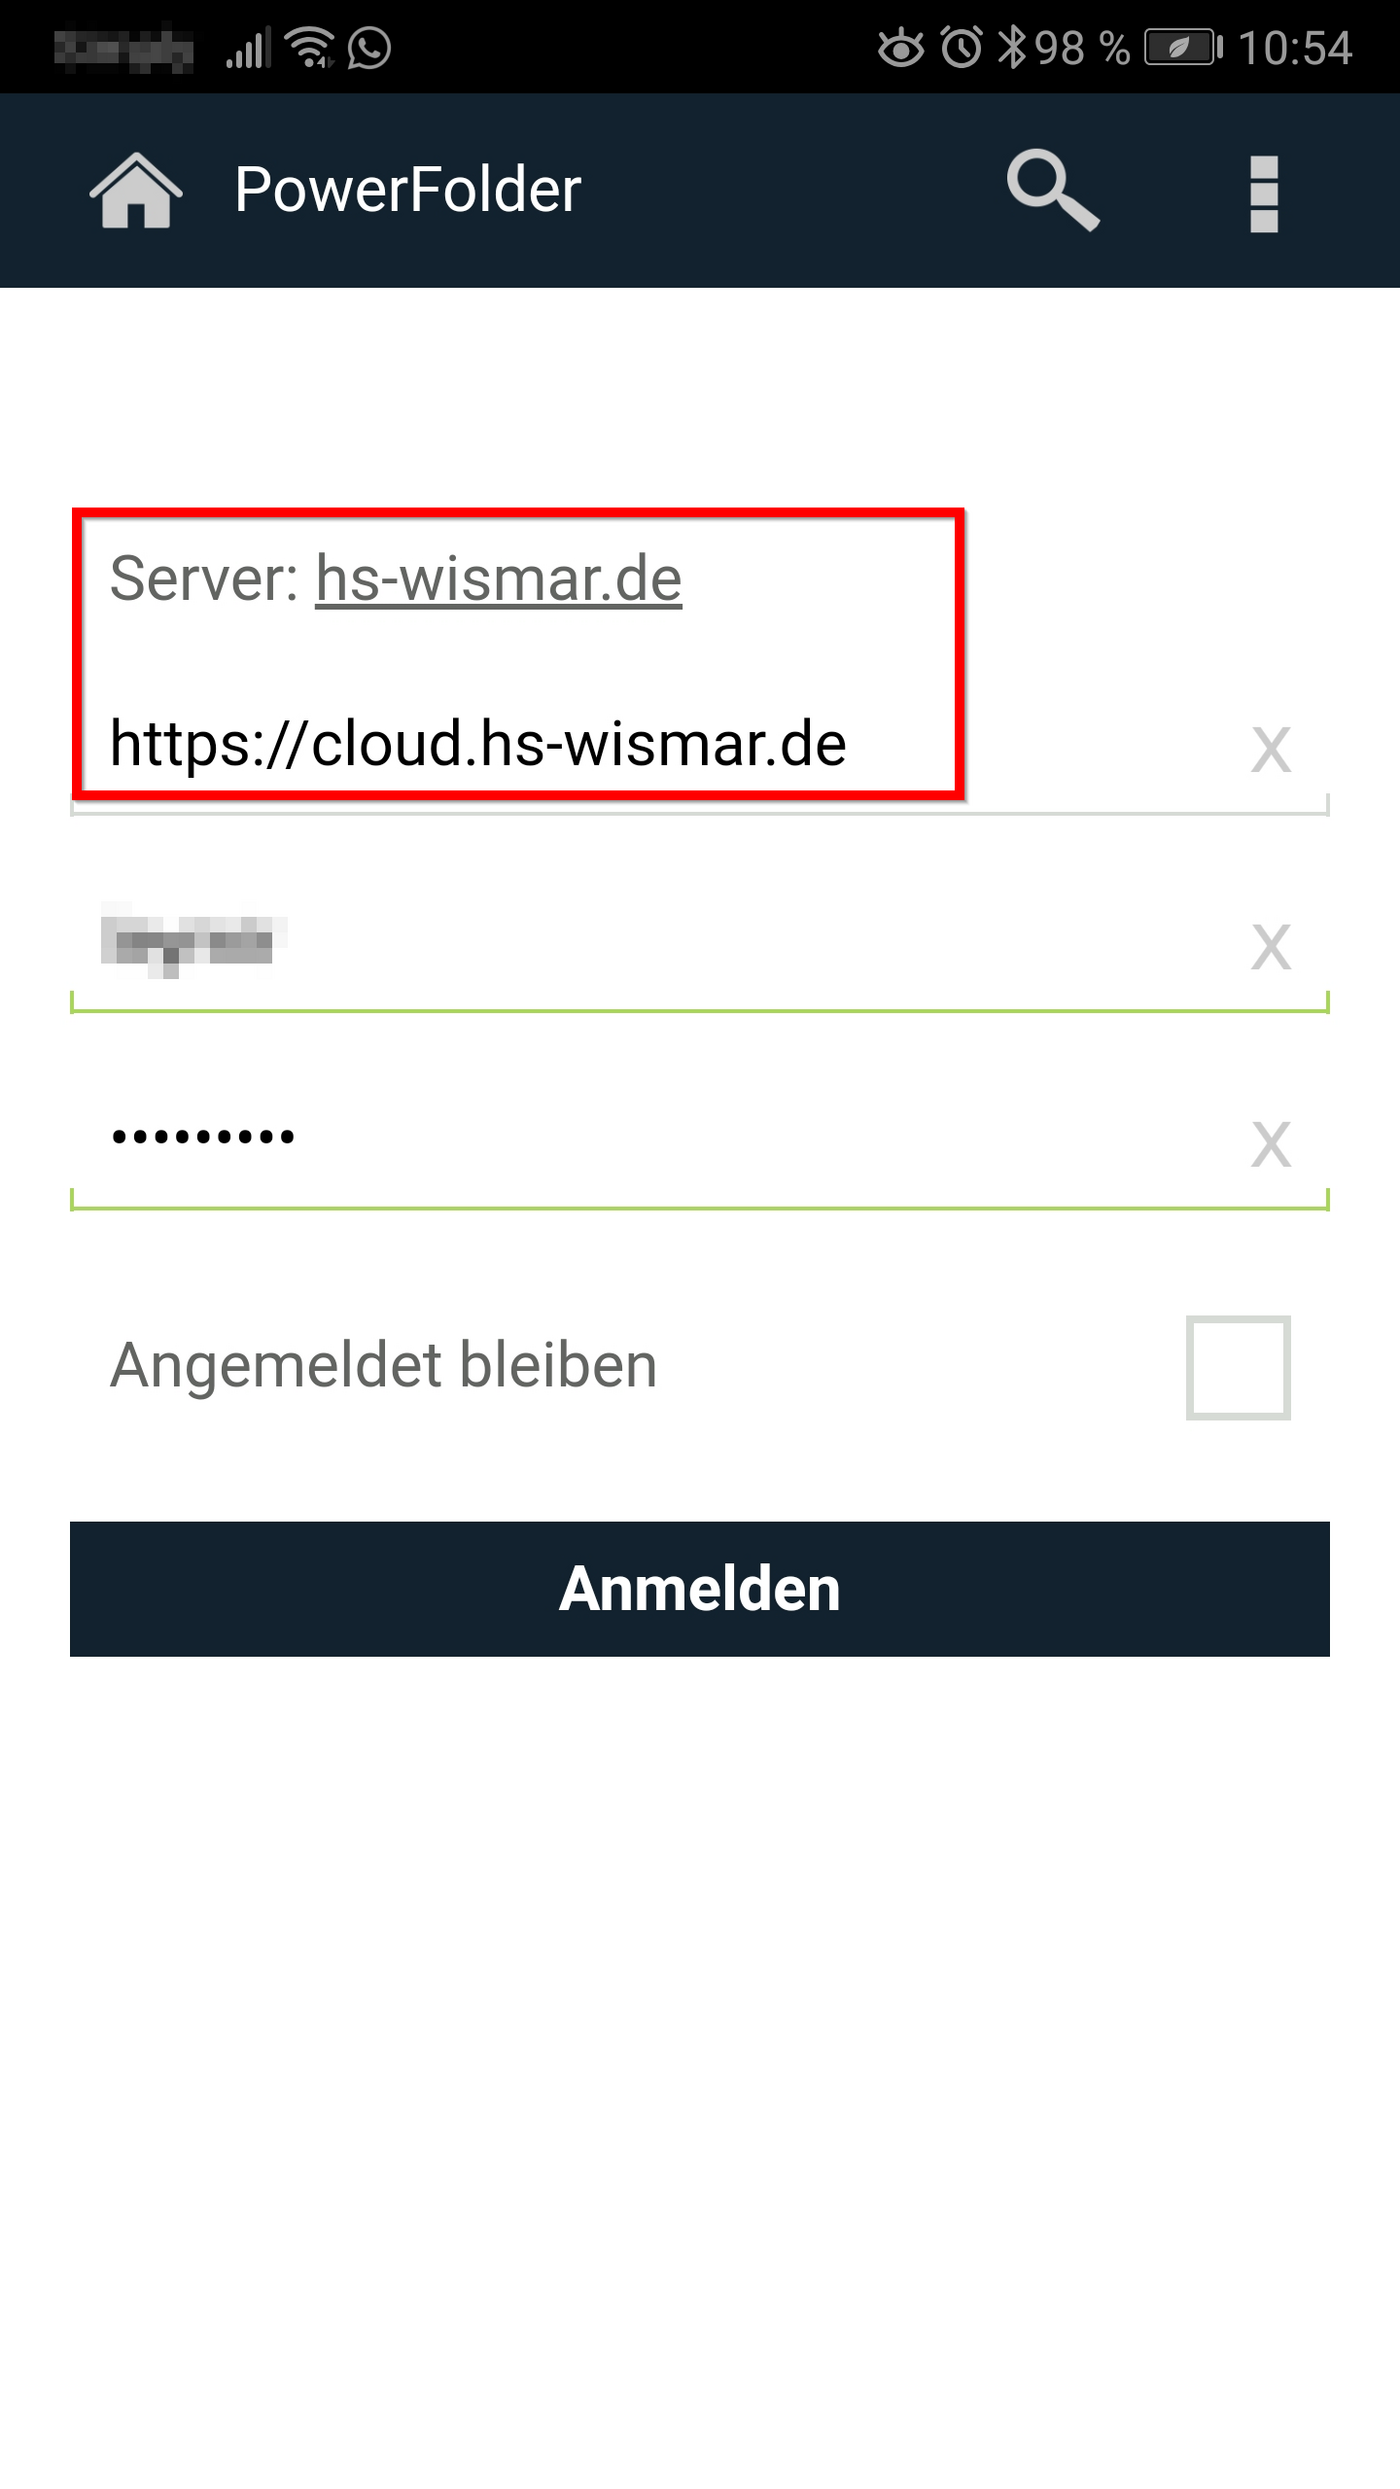
To be able to use the mobile app for iOS or Android with the CampusCloud and your university account, you have to change the server address on your own at https://cloud.hs-wismar.de.
Manage Storage Space
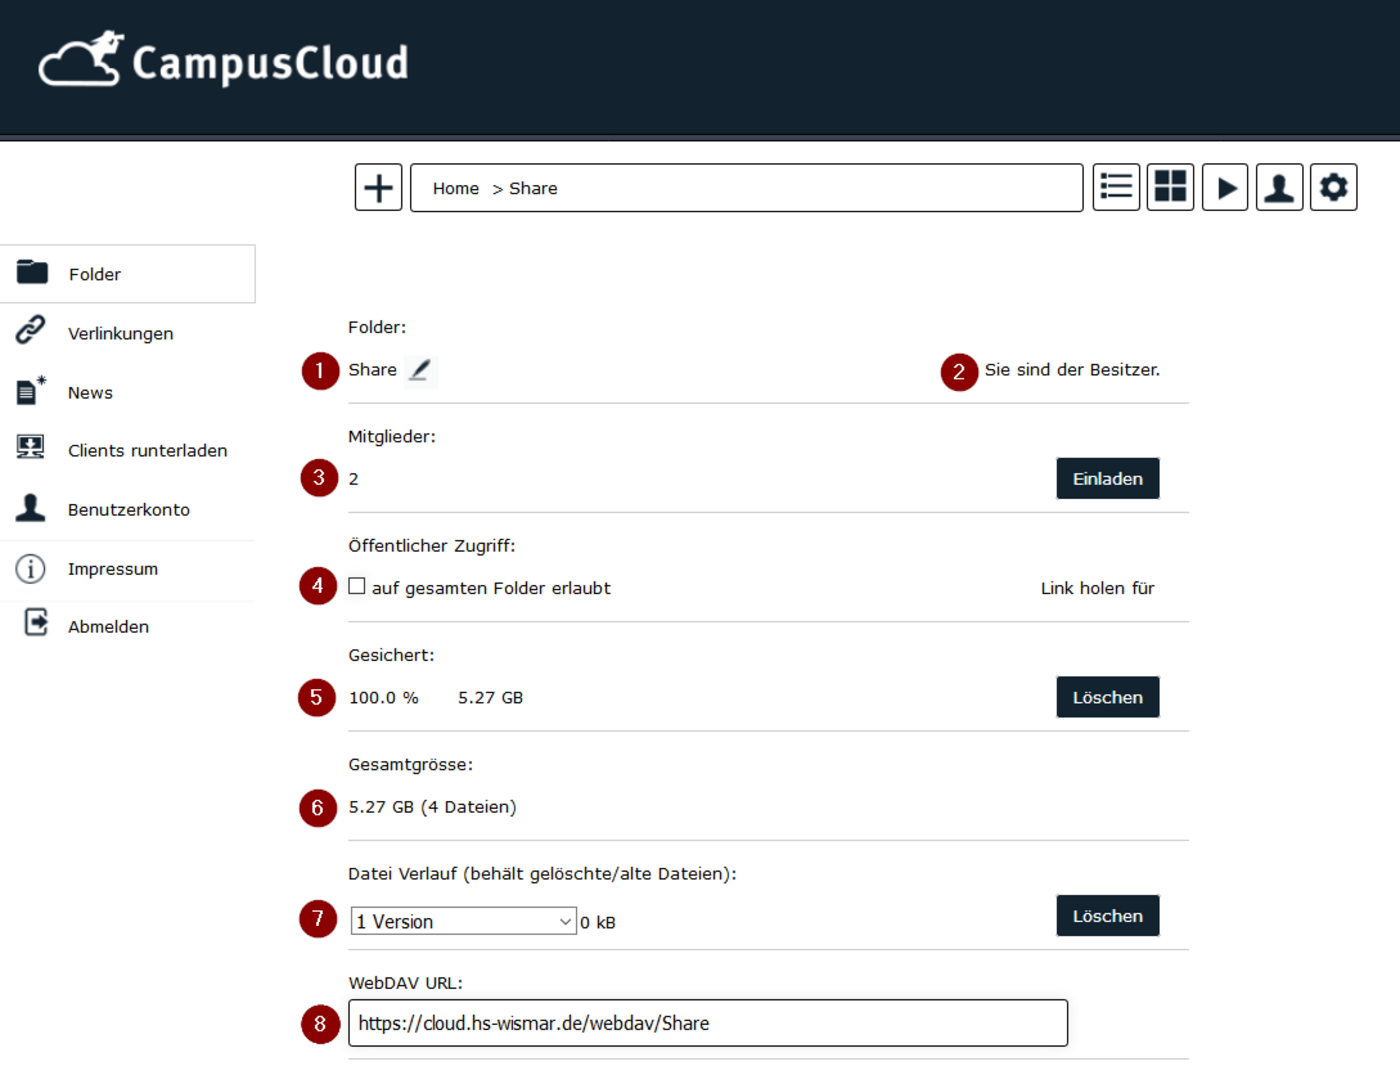
If you reach the 10GB or 5GB capacity limit, you may want to check for older versions of your files first. (Five versions of each file are kept by default.) To save disk space, you can adjust this behavior in (7) and delete all old versions with a mouse click.
Note: If you are an employee of the university and need more storage space, please contact the contact person.